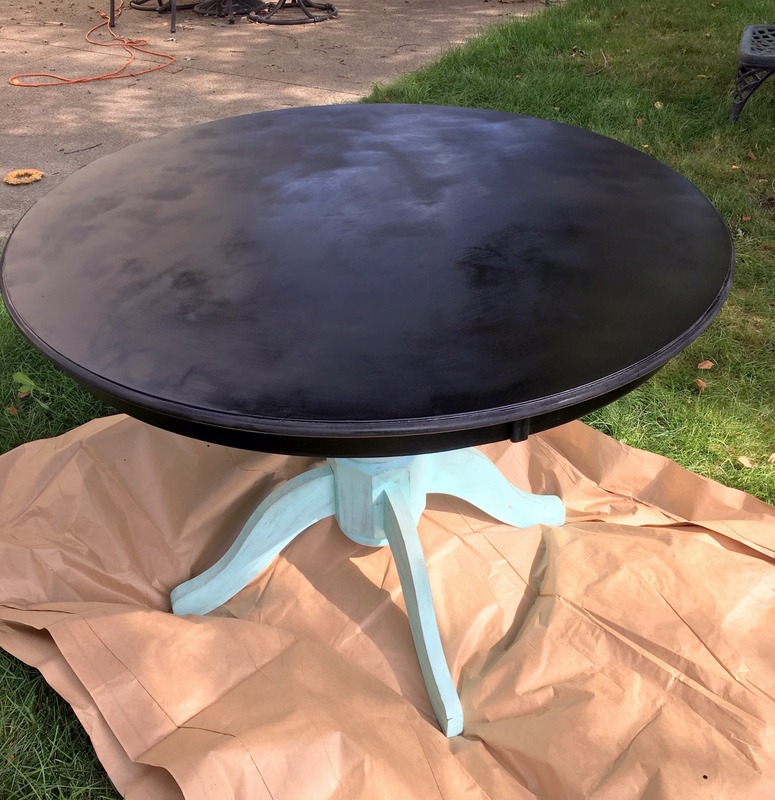
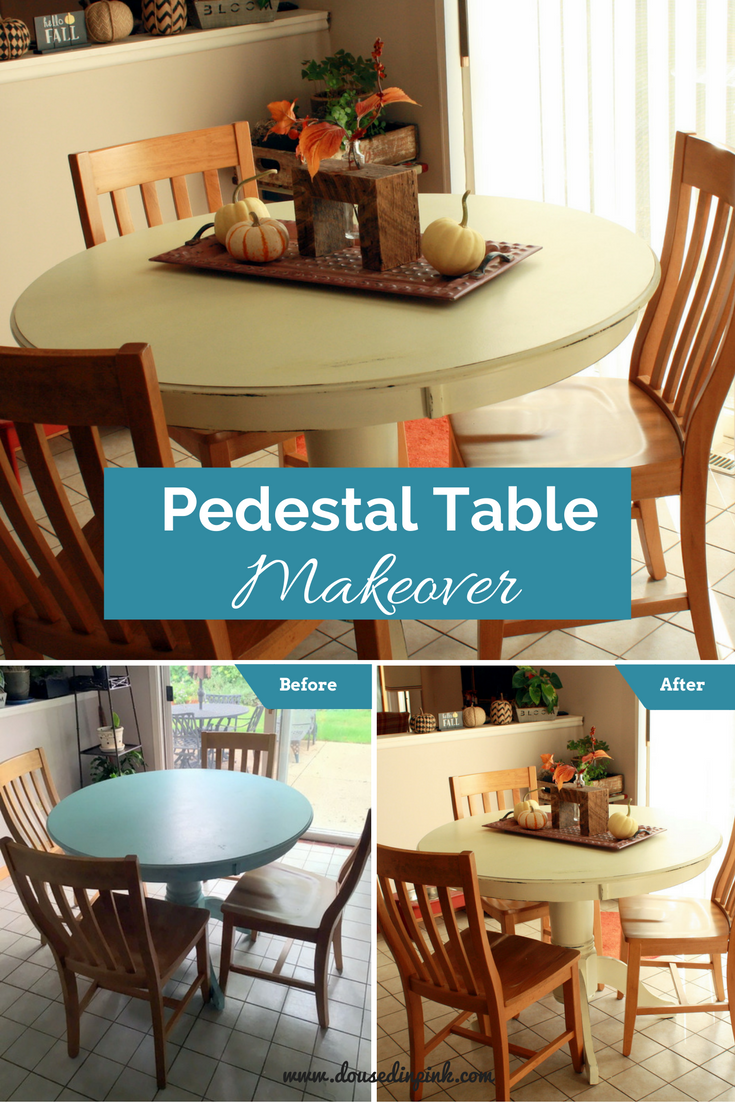
I picked up this table from a resale shop when we moved into our current home a year and a half ago. The robin egg blue needed to go, plus the table top was stained and discolored. I had all intentions of refinishing it right away but it never happened. Finally, over the summer I got motivated and got it done!

Project Supplies:
Rust-Oleum General Purpose Black Spray Paint
Behr Marquee Satin Enamel Paint + Primer
Verathane Polyurethane Satin
Drop cloth
2 1/2 inch nylon flat paint brush
Mini foam roller for smooth surfaces
Fine and medium grit sandpaper
Step 1: Prep – the first thing I did was give the table a good cleaning. I like Murphy’s Oil Soap.
Step 2: Sand – Using an electric sander and medium grit sandpaper, I got to work. It took a good hour for the layers of paint to come off, but then to my dismay, I discovered my table was made of particle board!

My plan had been to stain the top a dark pine and paint and distress the base an antique white. Particle board meant that it could not be stained. On to plan “b” – paint the entire table and distress it in antique white.
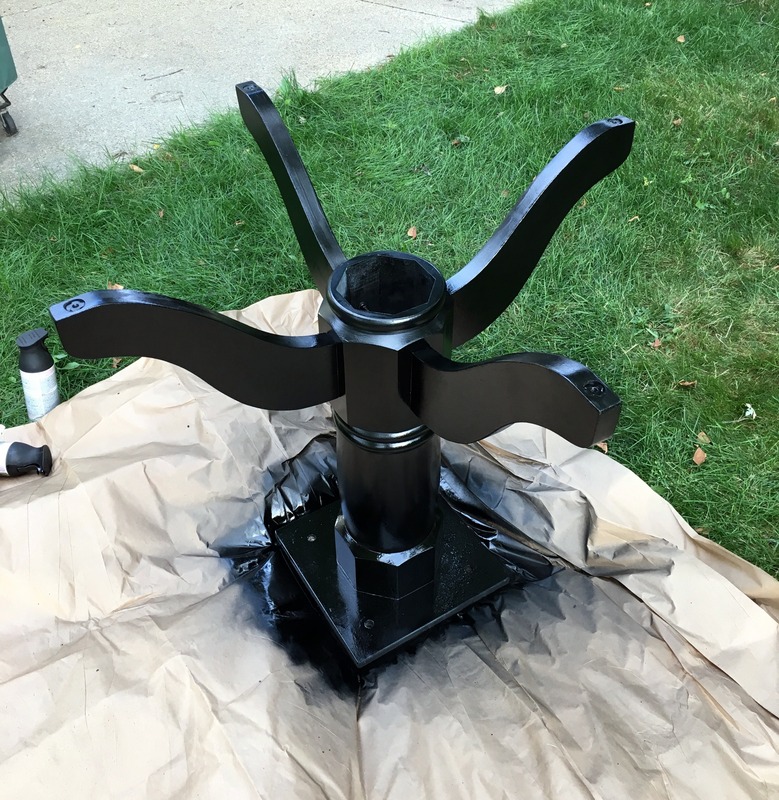
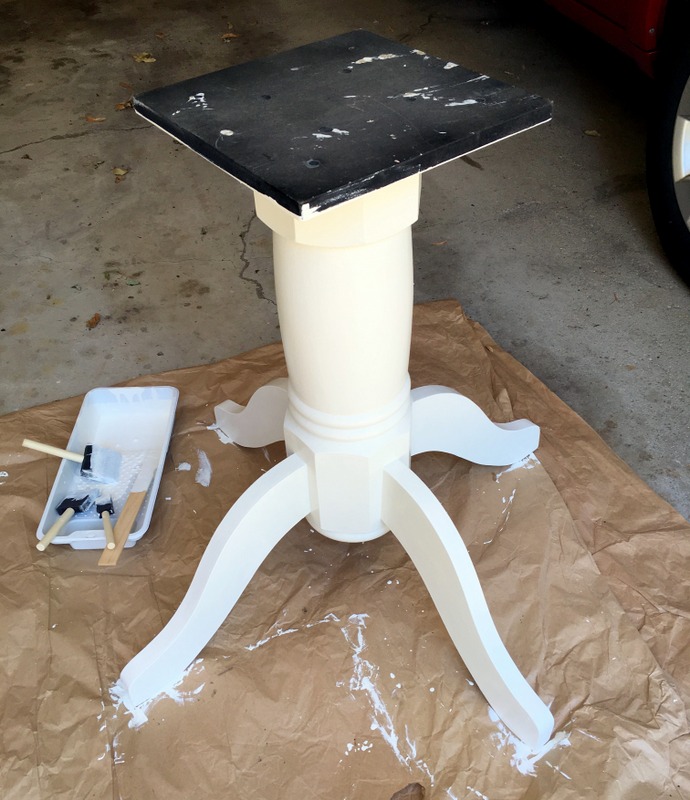
Step 3: Paint the distressed color. Pick a darker paint color that you want to show through when you distress the table. To make it easy, I used gloss black spray paint and sprayed two coats. Let dry and lightly sand in between coats.
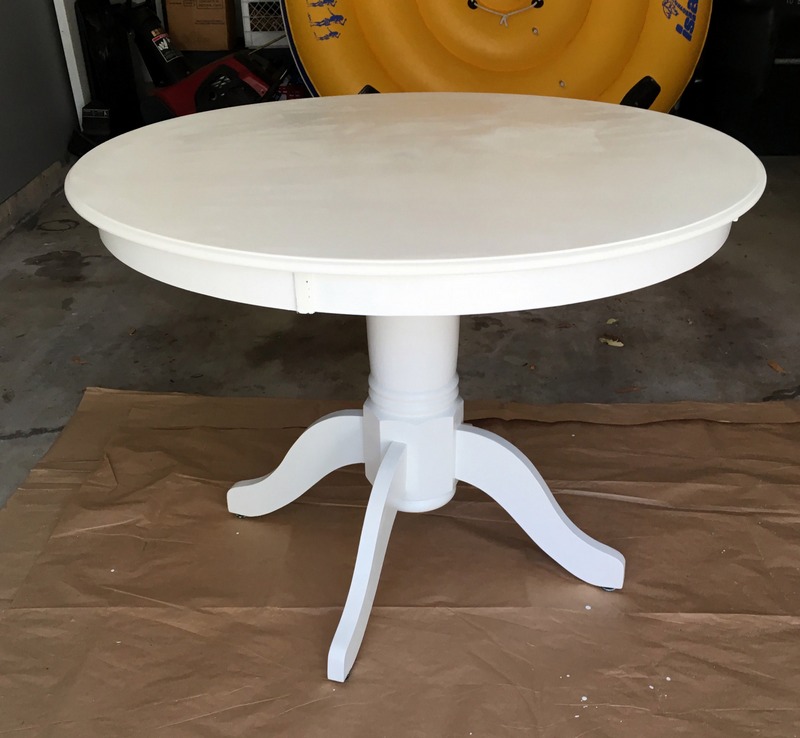
Step 4: Paint the contrasting color. I used a semi-gloss in snowfall white. I painted with a small foam roller for the tabletop and a paint brush for the sides, table base and crevices. Paint 2 – 4 coats (I did 4). Let dry and lightly sand in between each coat.
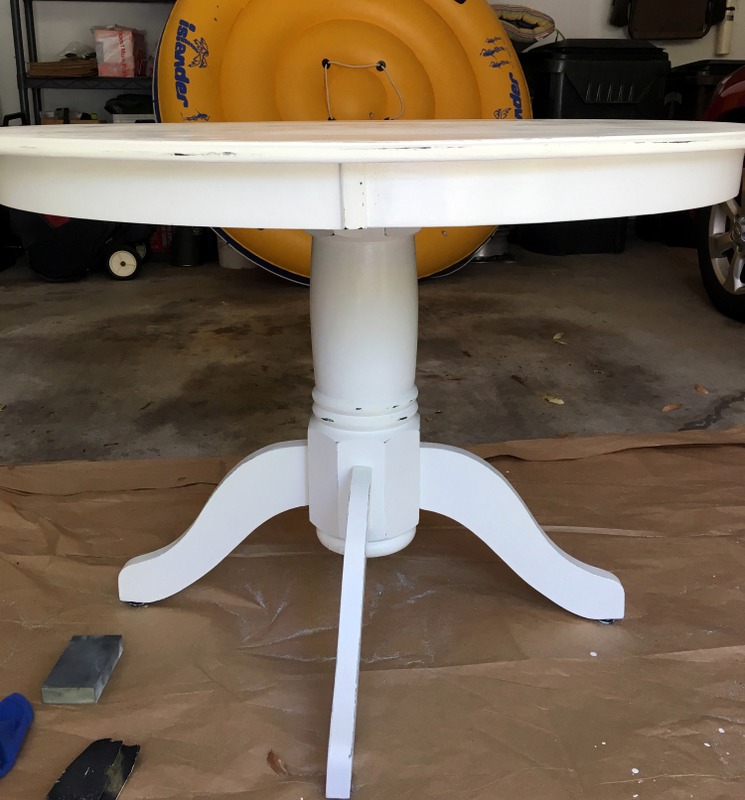
Step 5: Distress – using a sanding block or sander and a fine grit sandpaper (the higher the number, the finer the grit), distress the edges that would normally have wear over the years like the table legs, table top edges, a few spots on the top.

Step 6: Protect – sealing will give it a nice finish and allow you to easily clean it. In a well ventalated area, brush on several coats (I did 5 coats) of polyurethane satin clear protectant, letting dry and lightly sanding in between. Finally, let dry for 24 hours before bringing inside.

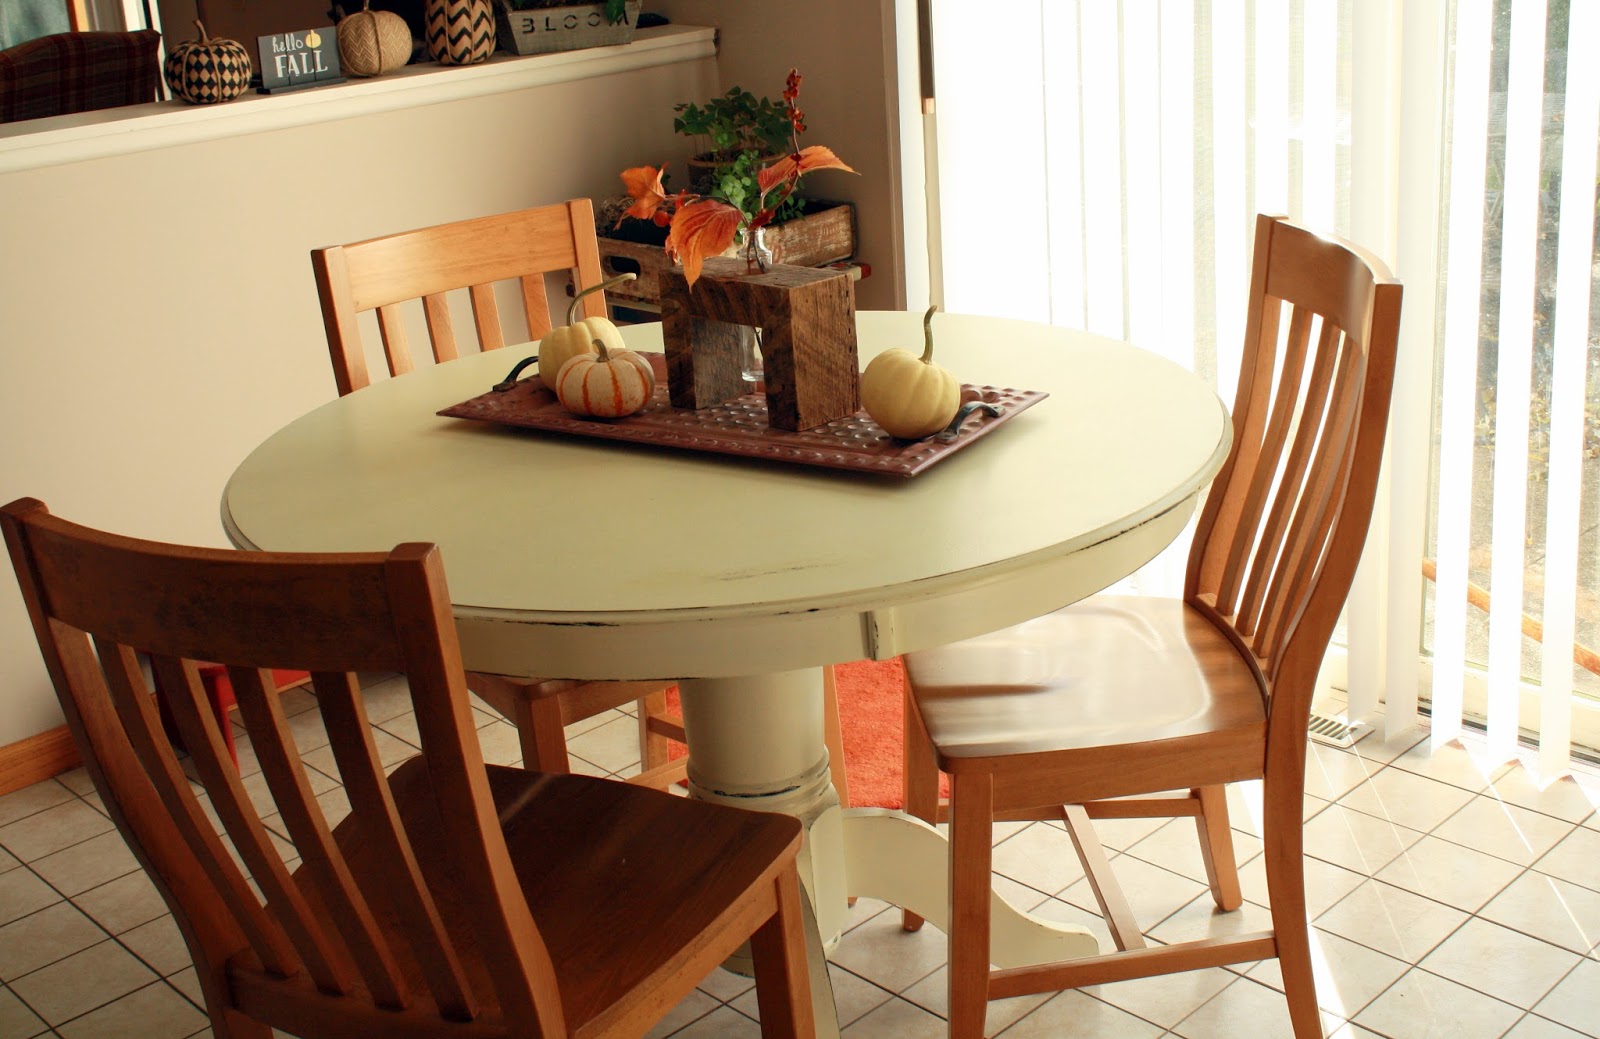
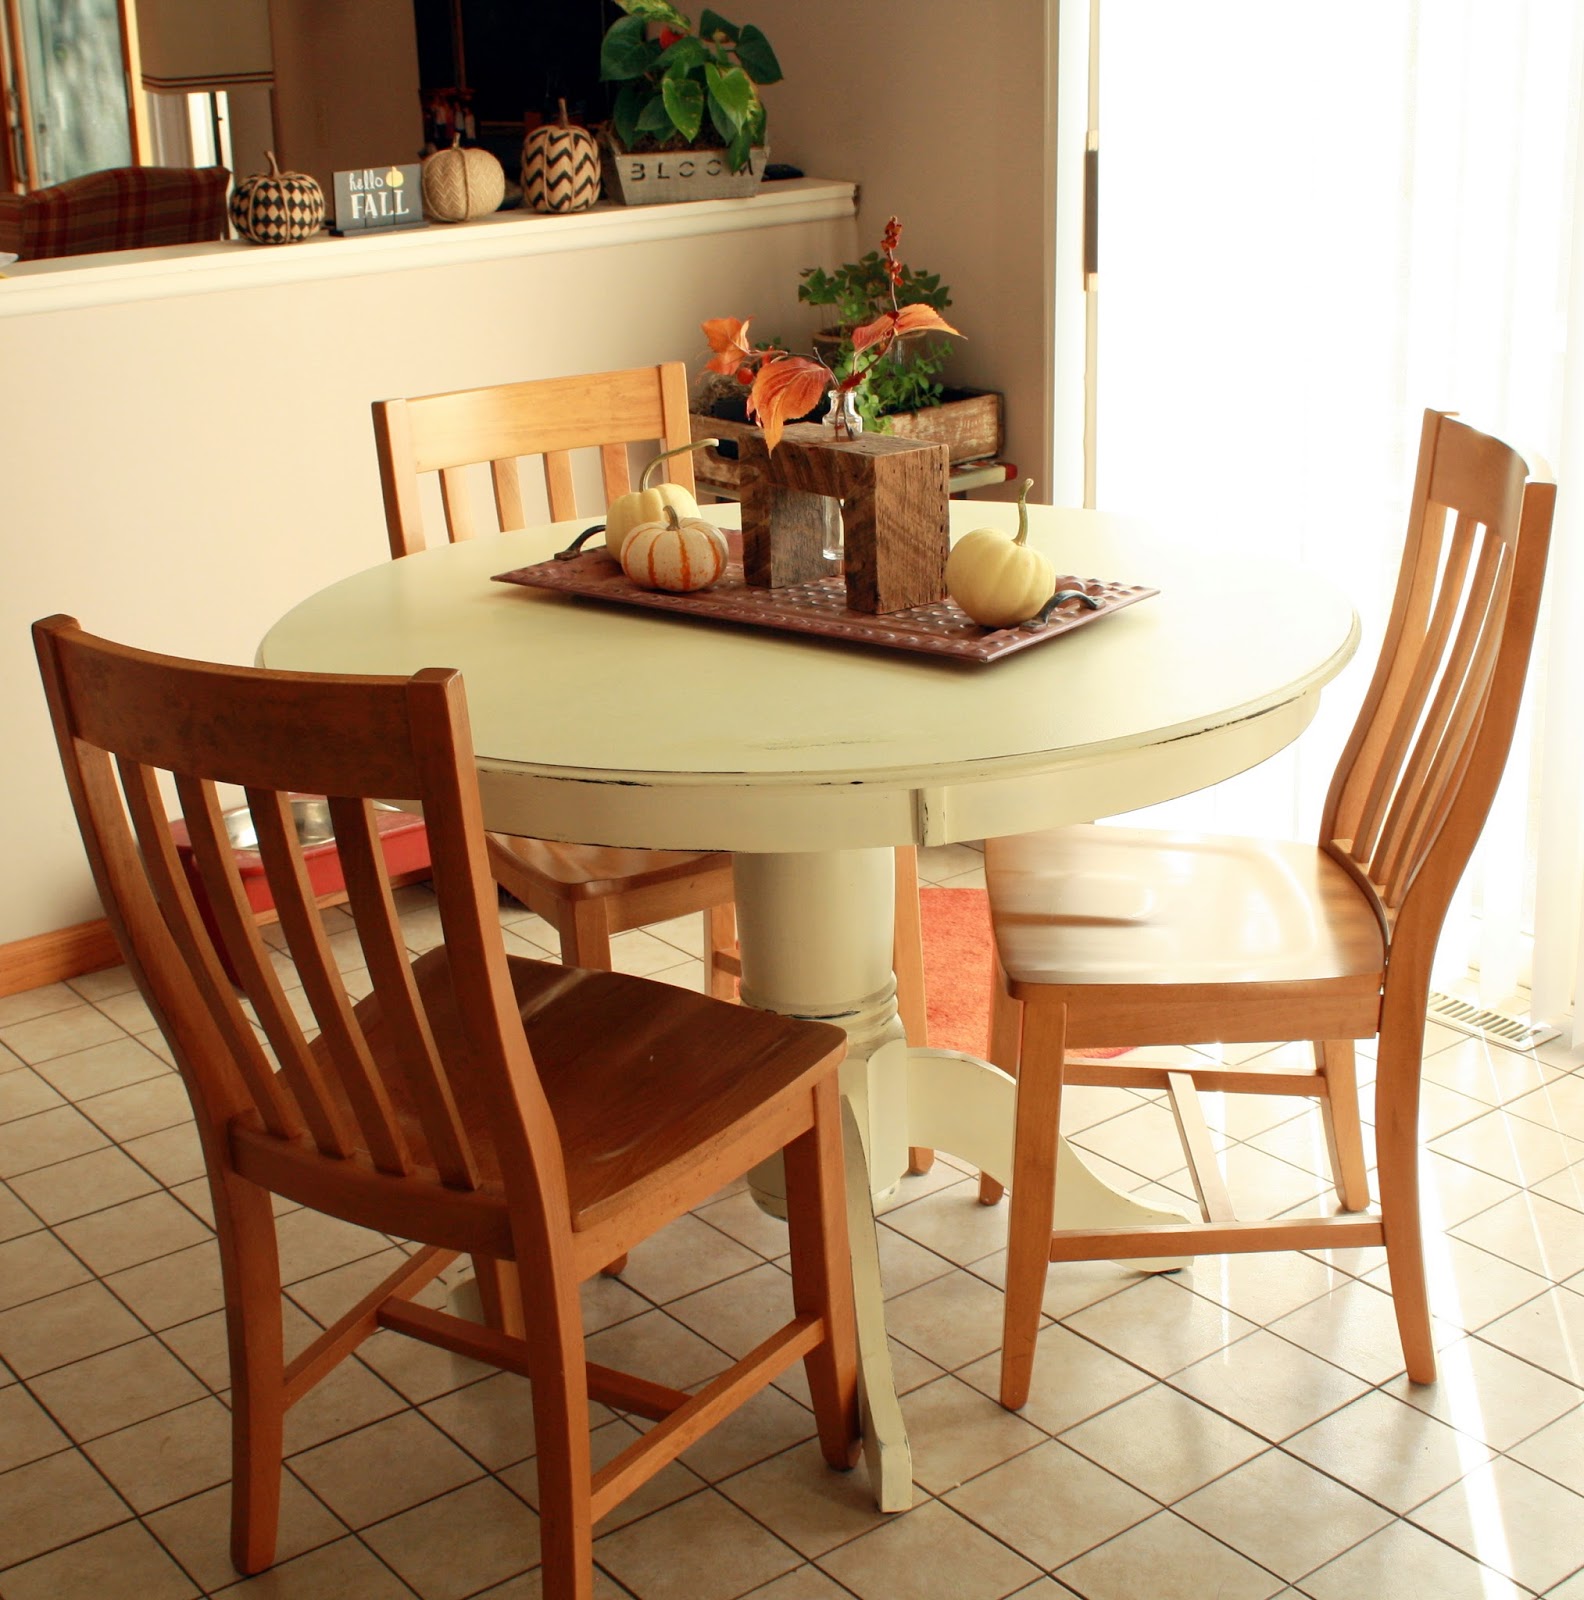
Not bad for a weekend project! I love the transformation and don’t know why I waited so long!
Thank you for visiting!
Linking up with these fabulous bloggers.
Follow along!