We love our home. We really do. But if I’m being honest, it has always had one significant drawback: the layout. Our house is boxy, the rooms are small, and entertaining has always felt like a bit of a puzzle. If you have been following along, you know we have been chipping away at this house for years, and this before and after dining room remodel is the next project I’m excited to share. We’ve looked at other homes in the neighborhood here and there, but nothing compares to our lake view. So instead of moving, we keep making it work.
The dream has always been to open up the wall between the living room and family room. That wall, unfortunately, houses all of our HVAC, and relocating it would be enormously expensive and would likely steal square footage from another room in the process. So that project stays on the wish list.
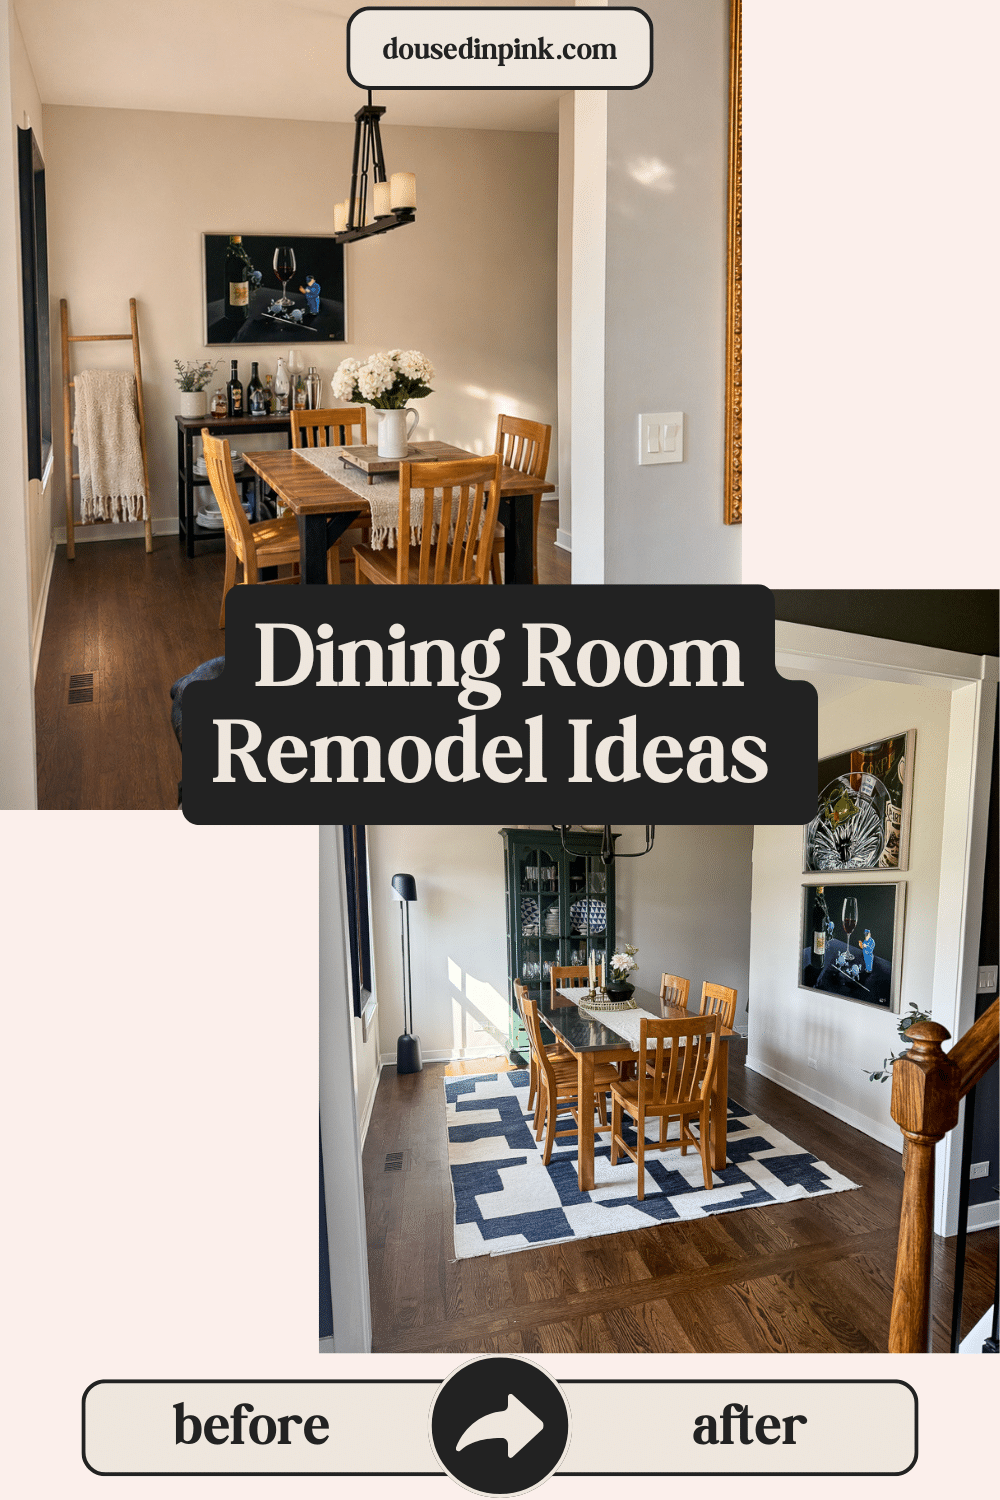
What we could do was open up the dining room. And that decision led to the most satisfying before and after dining room remodel we have done in this house. Here’s what it looked like before.
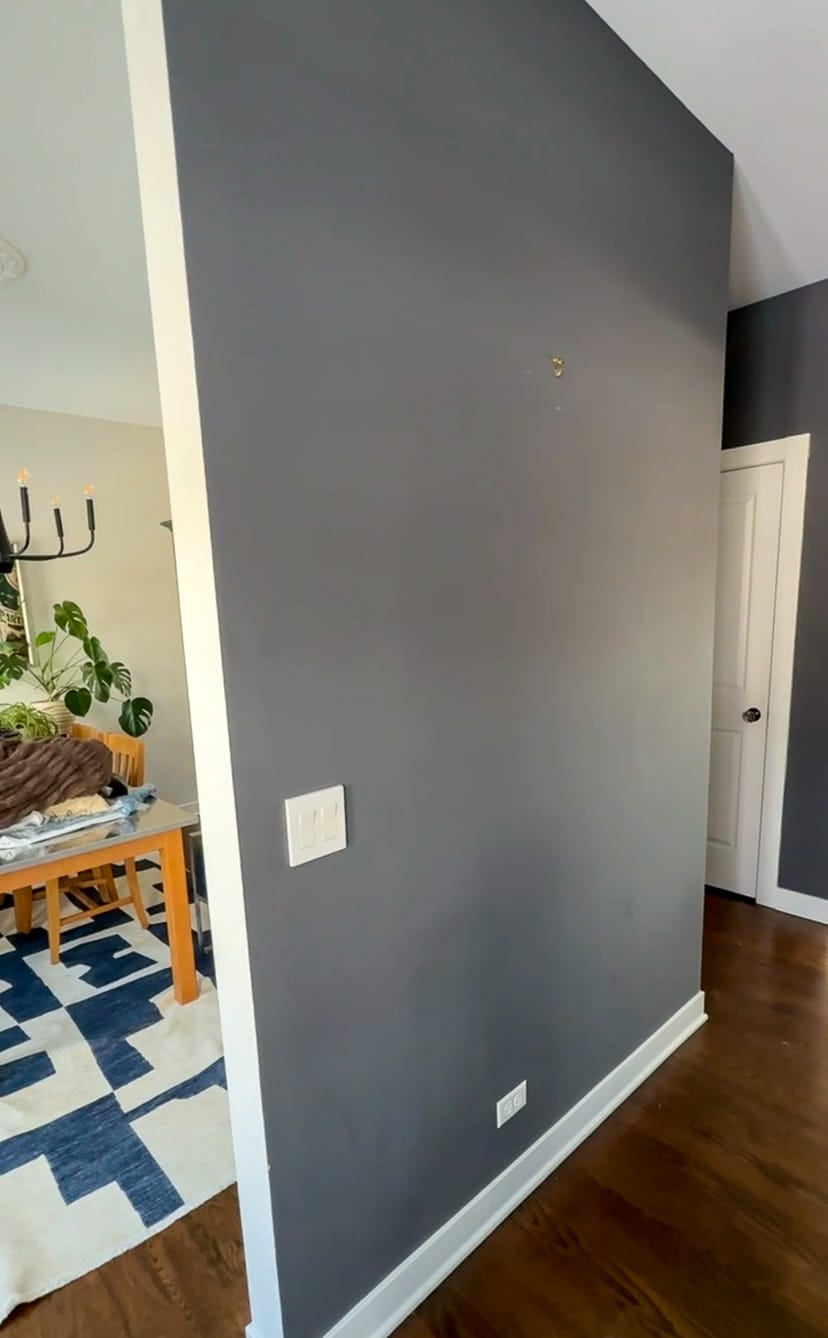
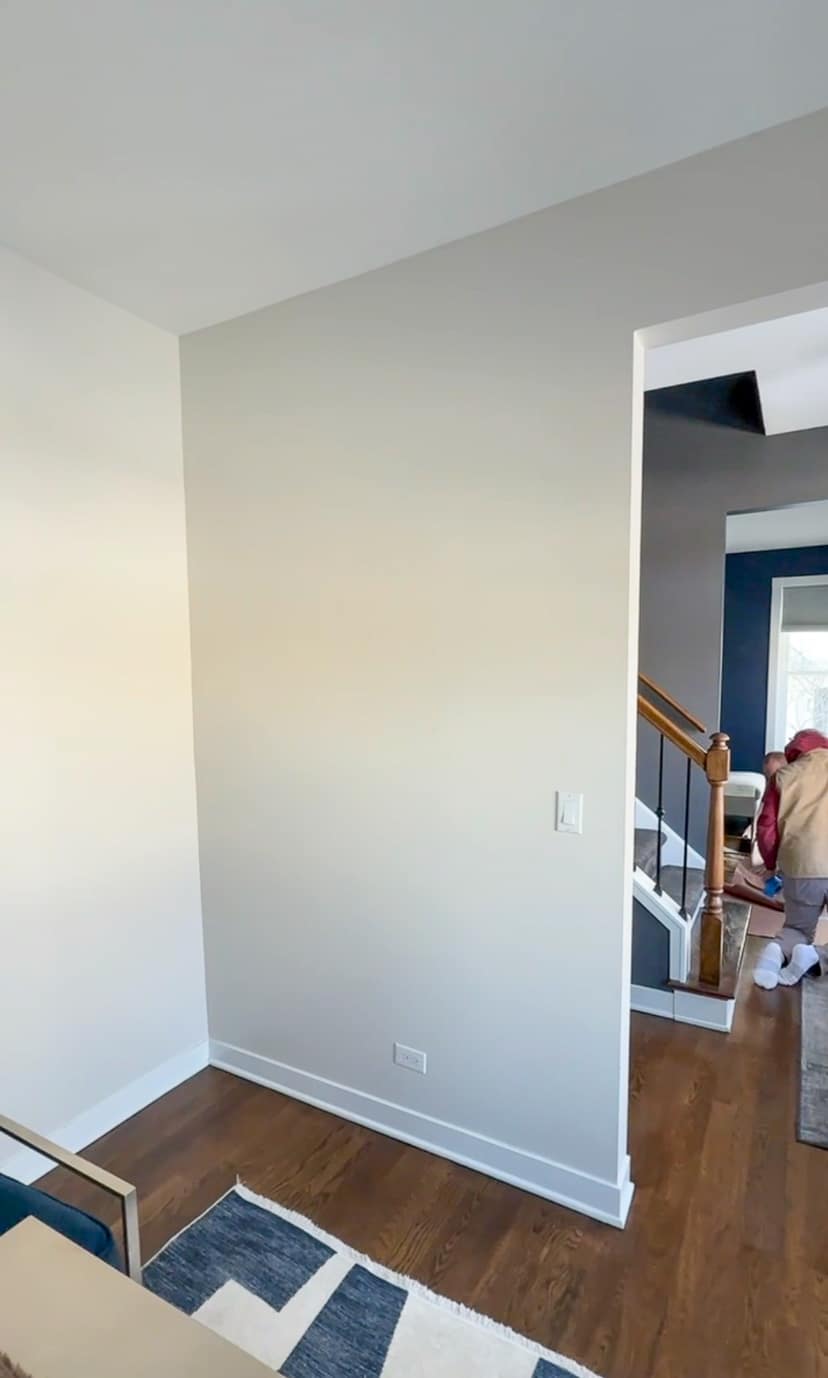
That standard 40 by 96 inch doorway was doing the space no favors. Walking into the dining room always felt a little like stepping into a box. We knew even a wider opening would change how the whole main floor felt.
We have done 99% of the renovations on this house ourselves, and honestly, it has been one of the most rewarding parts of homeownership. But for this one, we decided to bring in some help. Our contractor was incredibly meticulous from the start. The prep work alone took several hours. Plastic walls went up throughout to contain the drywall dust, which, if you have ever done any demo work, you know is absolutely essential.
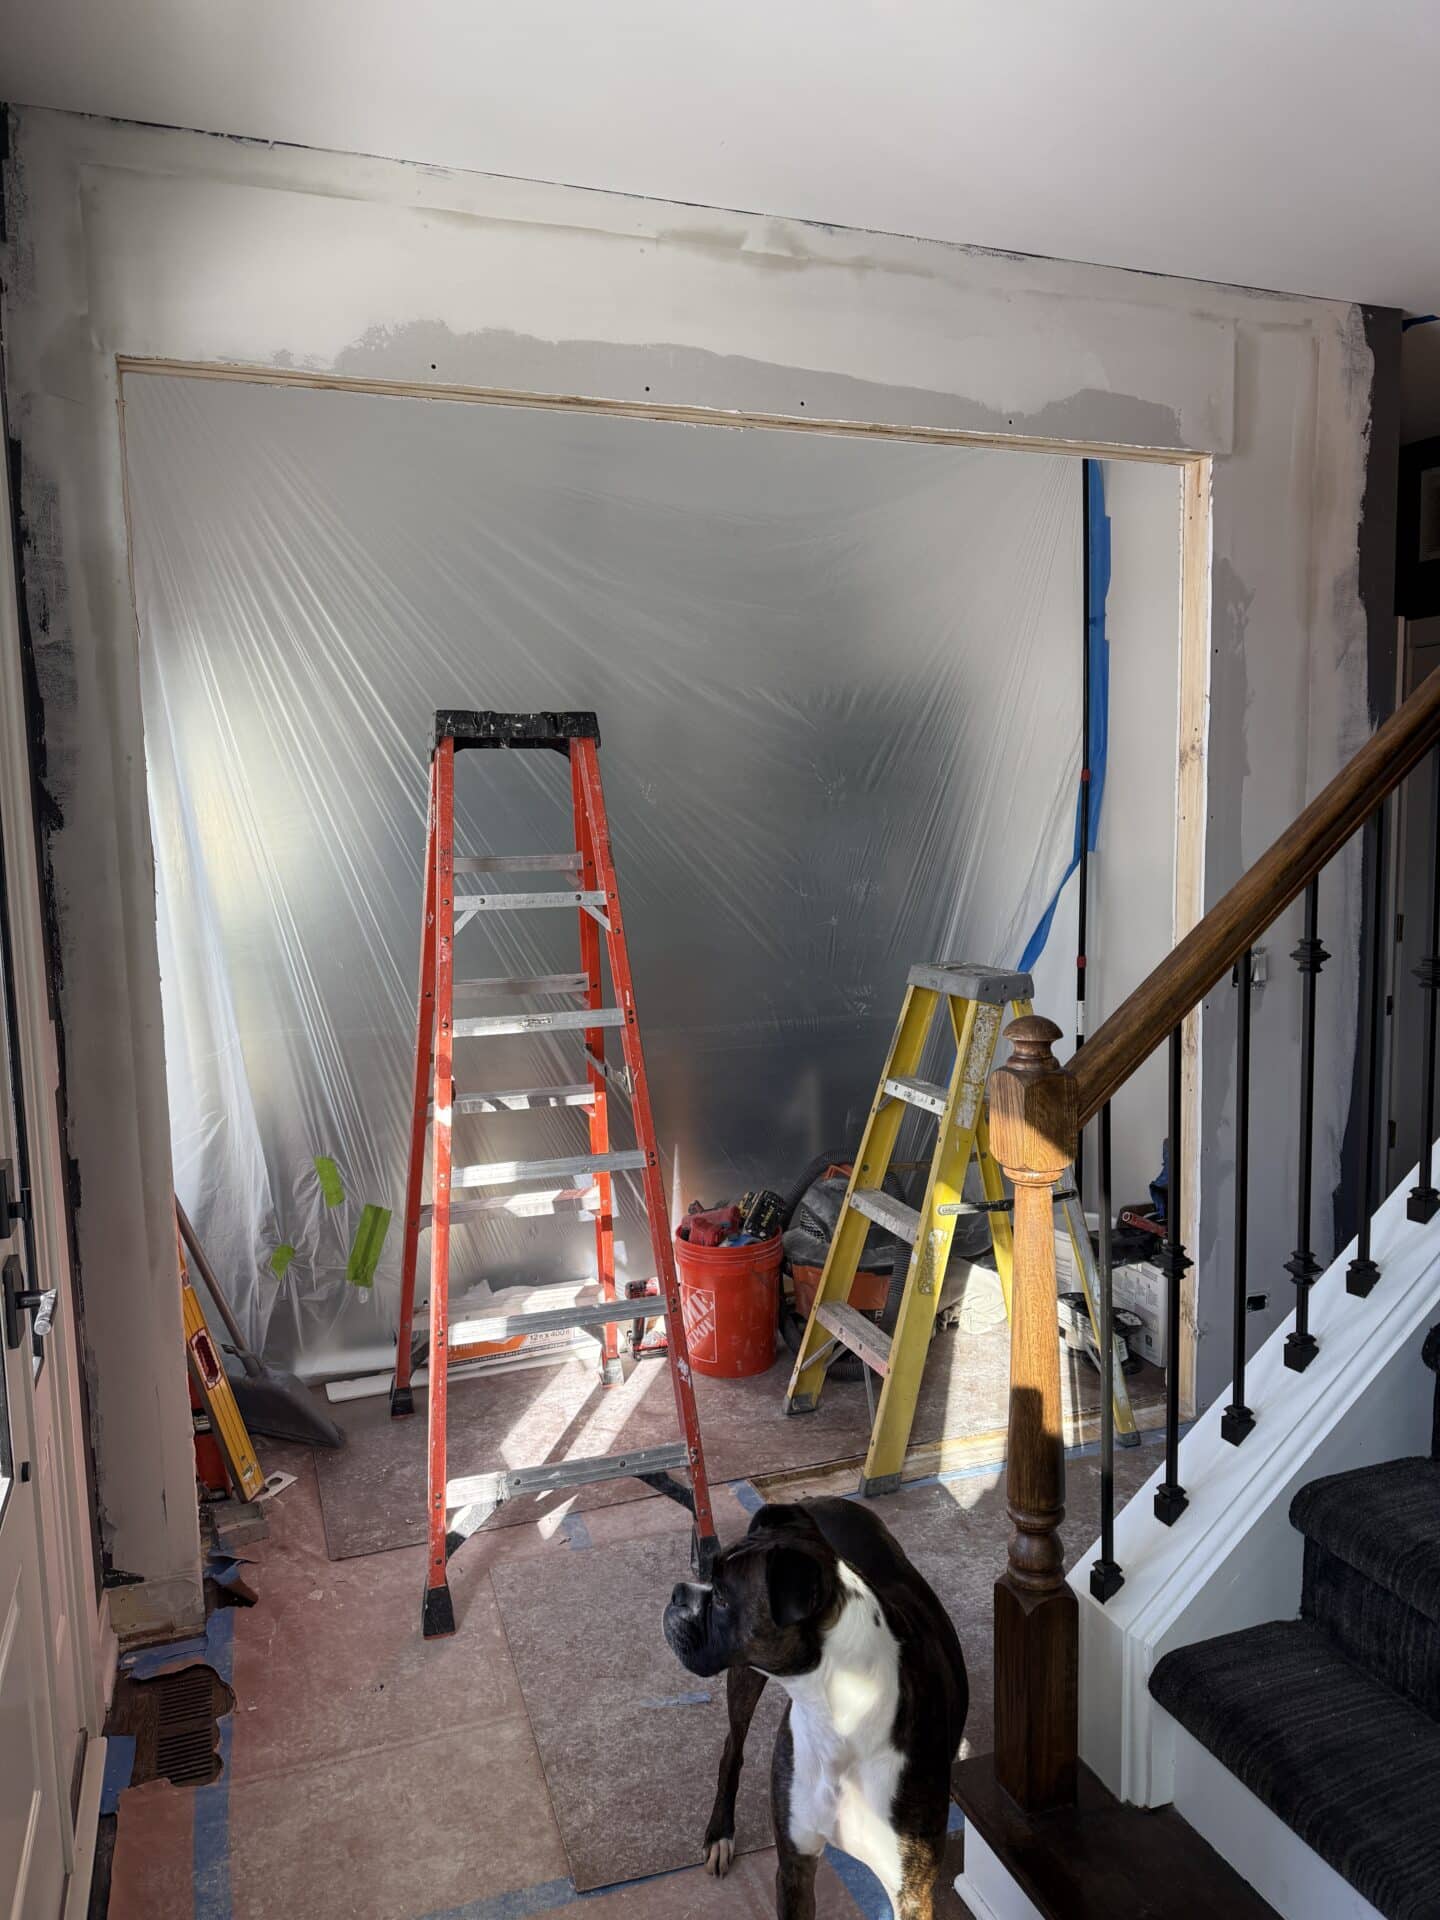
Interestingly, removing the actual wall was the fastest part of the whole project. What followed was reframing, relocating the electrical and adding a new header and trim. The demo is almost always the easy part.
Then came the floors, and this is where things got a little more complicated than expected.
When you remove a wall, you are left with a gap of subfloor where the wall once stood. You have two options: match the existing hardwood for a seamless look, or use a transition strip for a deliberate contrast. The price difference between the two approaches was about $400, so we planned to match. What we did not plan for was learning that the original hardwood in the dining room was laid in various widths, which meant extra work to source matching wood. And once you are adding new wood to old floors, everything needs to be re-sanded and stained together for an even finish.
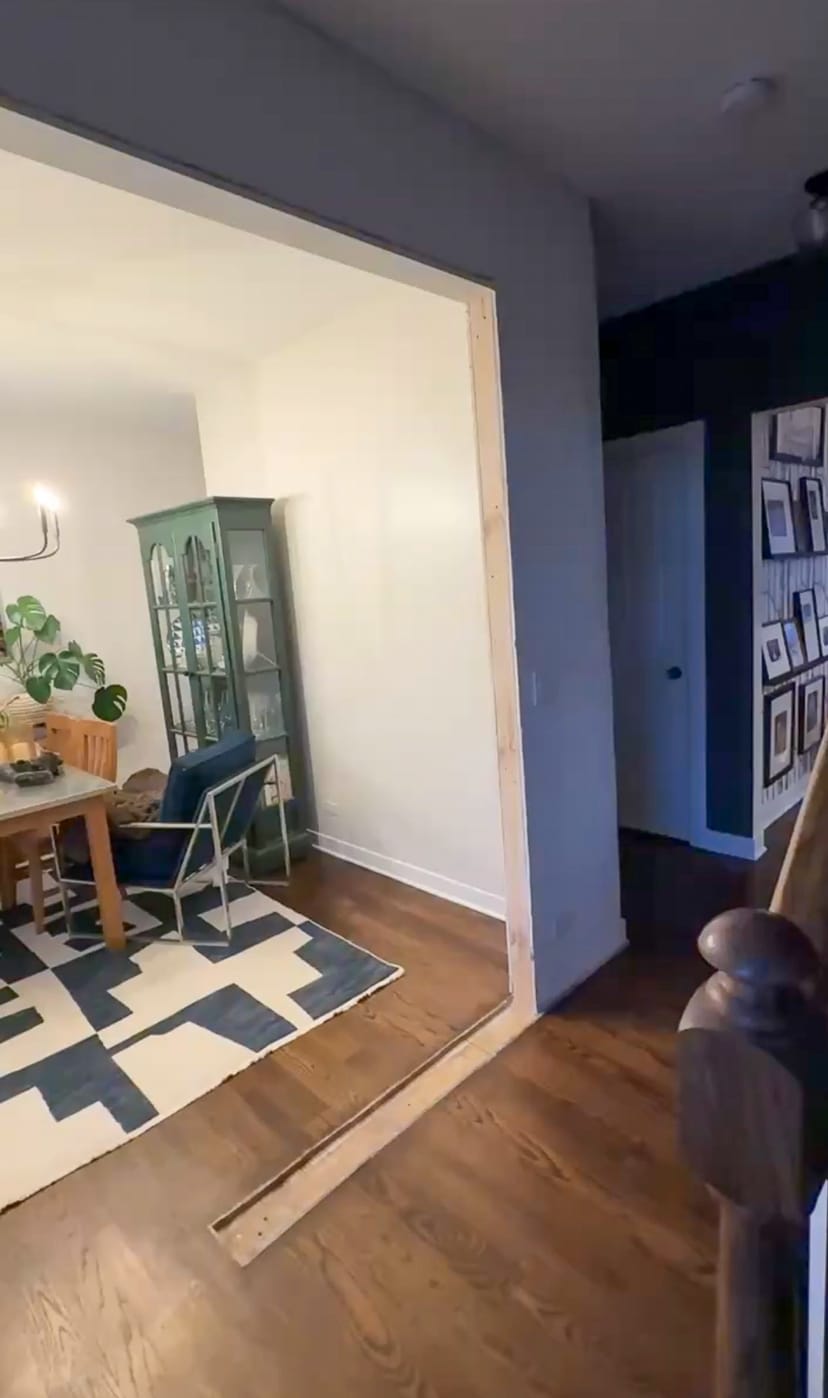
Here is where the budget took a turn. Because we had just created a wide open connection between the dining room and the hallway, both spaces needed to be done together. And because the hallway connects to the living room, the entire living room needed to be re-sanded and stained as well. That was not a line item we had budgeted for.
But the floors are beautiful. Worth every penny, even the unexpected ones. If you are planning a before and after dining room remodel of your own, budget a cushion for the floors. You will thank yourself later. It also helps to have someone measure every connected space before the wall comes down rather than only the room you are working on, because that is exactly where the surprise cost hides. Pricing varies a fair bit by market as well, so whether you are comparing flooring installation Cleveland quotes or something local to you, ask up front what re-sanding the adjoining rooms would add to the total.
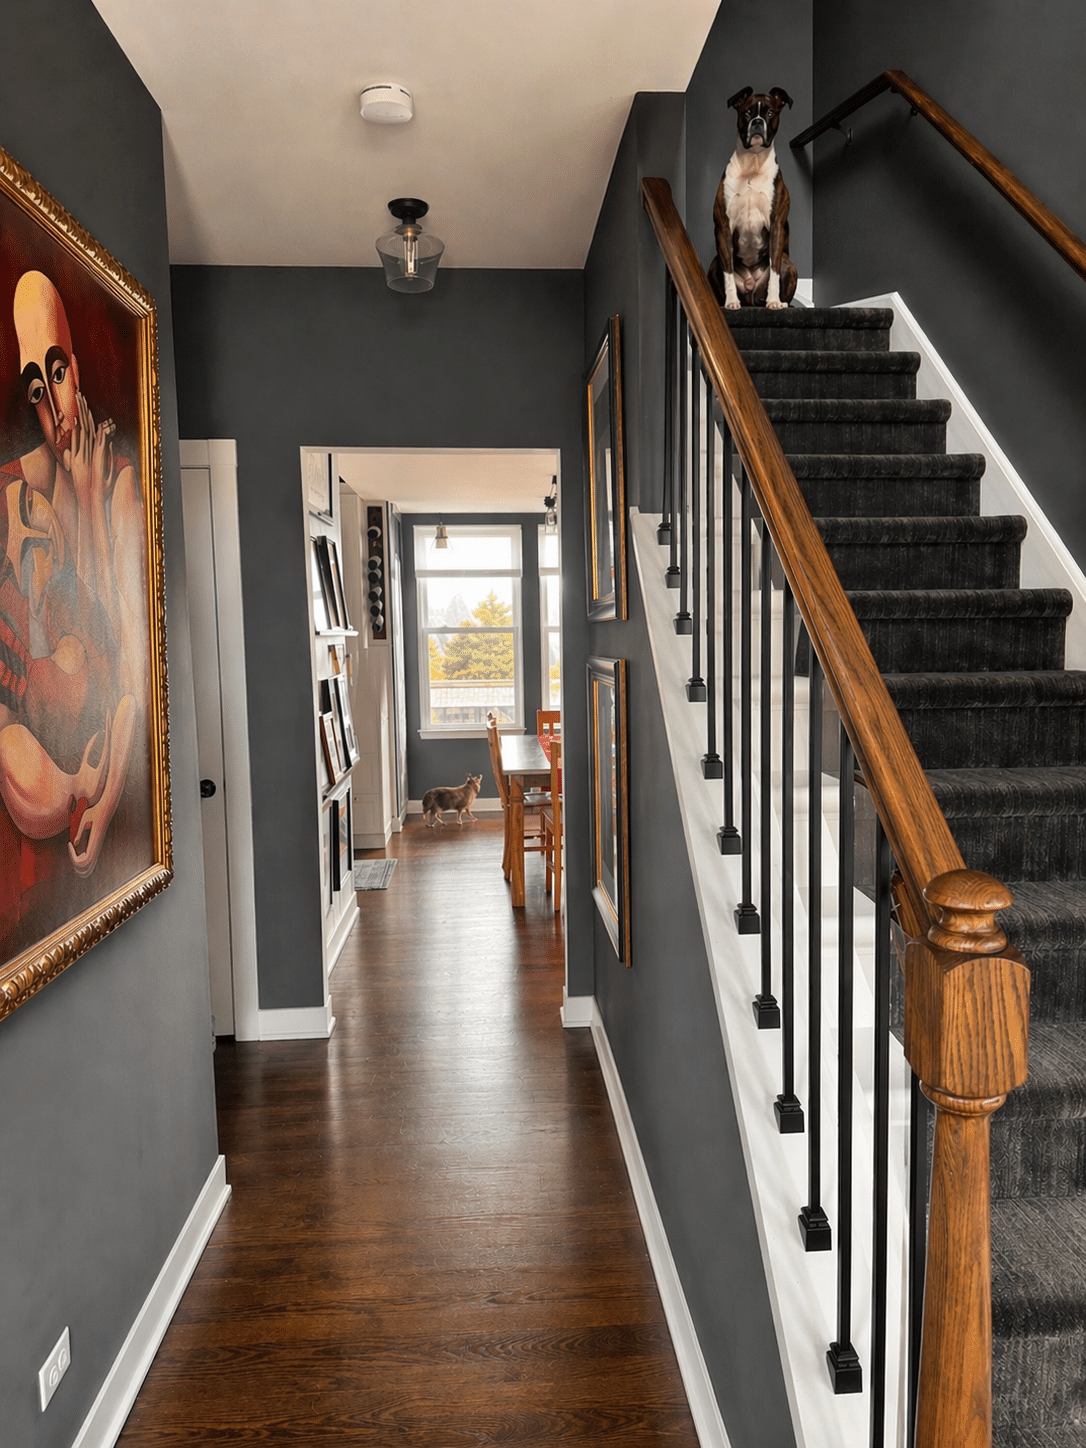
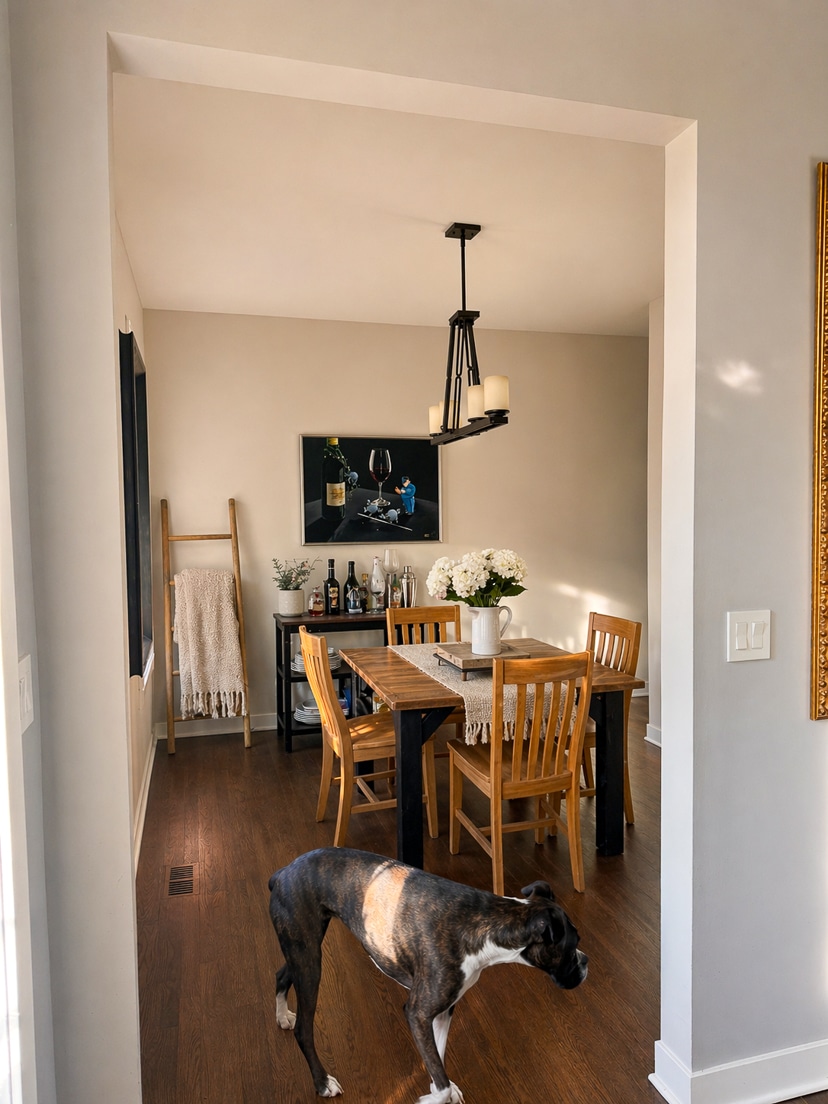
After the floors came fresh paint throughout the hallway and dining room and finally the chance to actually exhale. Here’s the after.
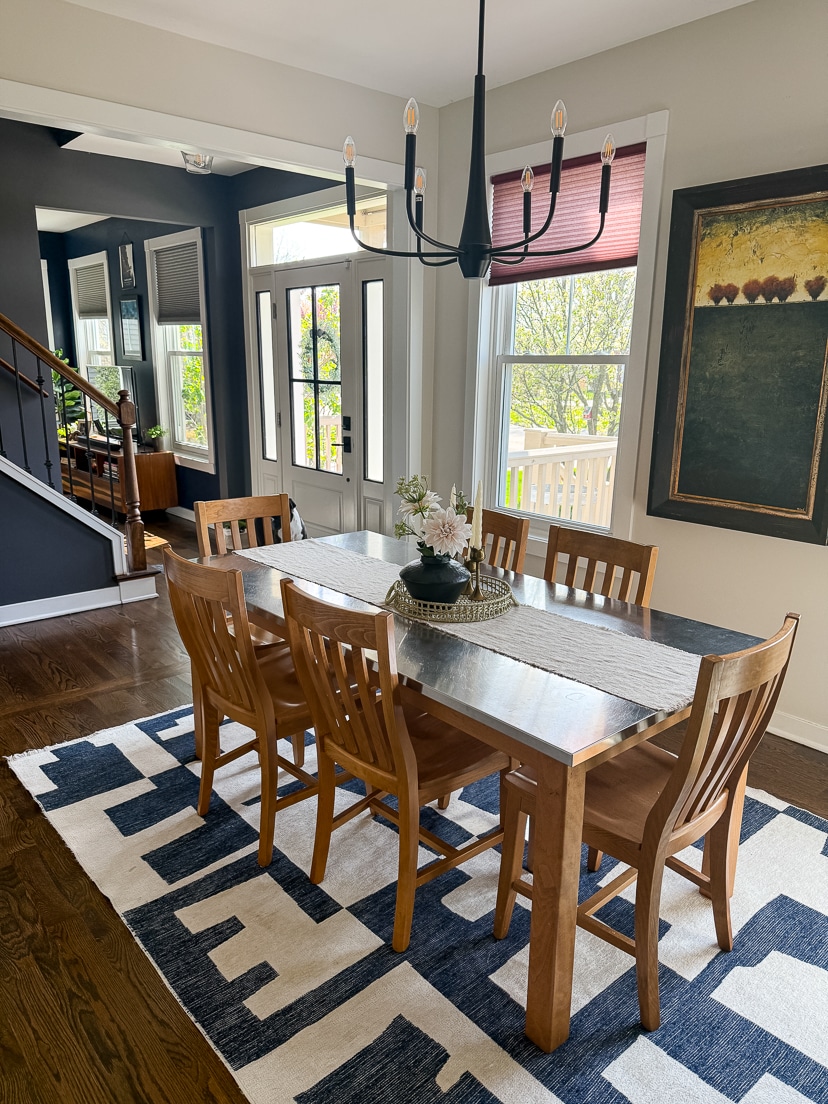
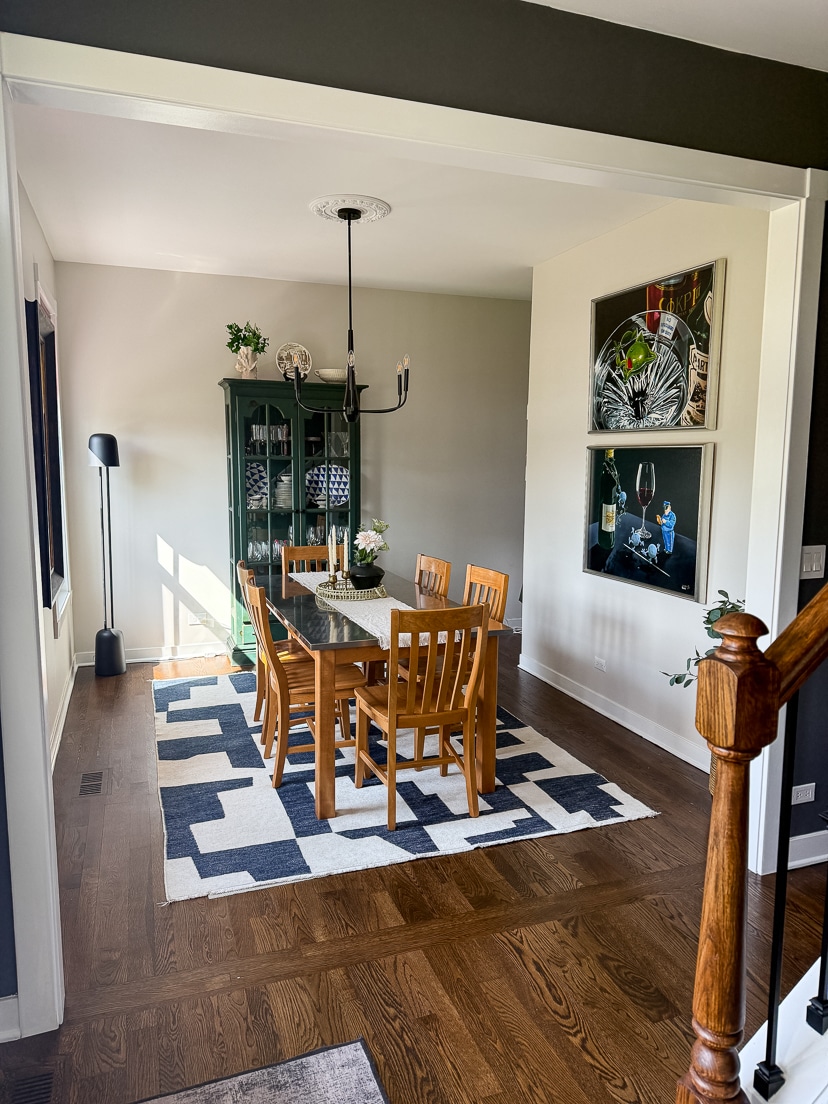
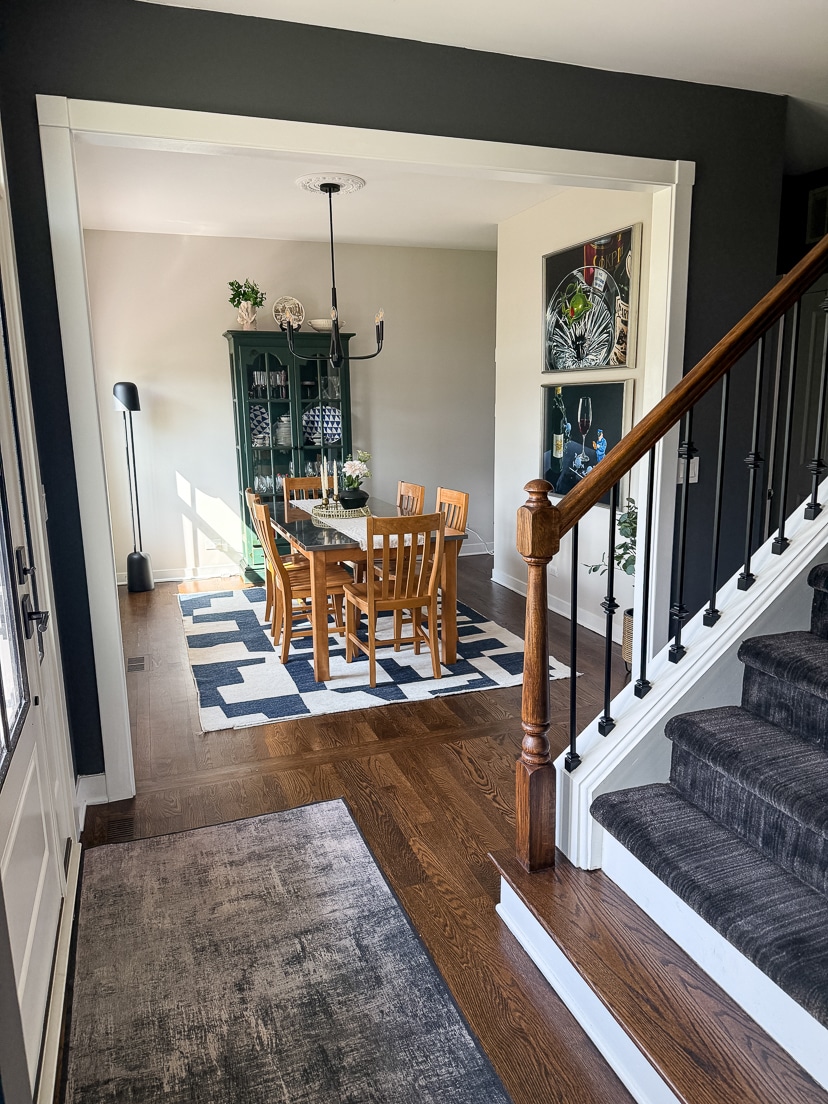
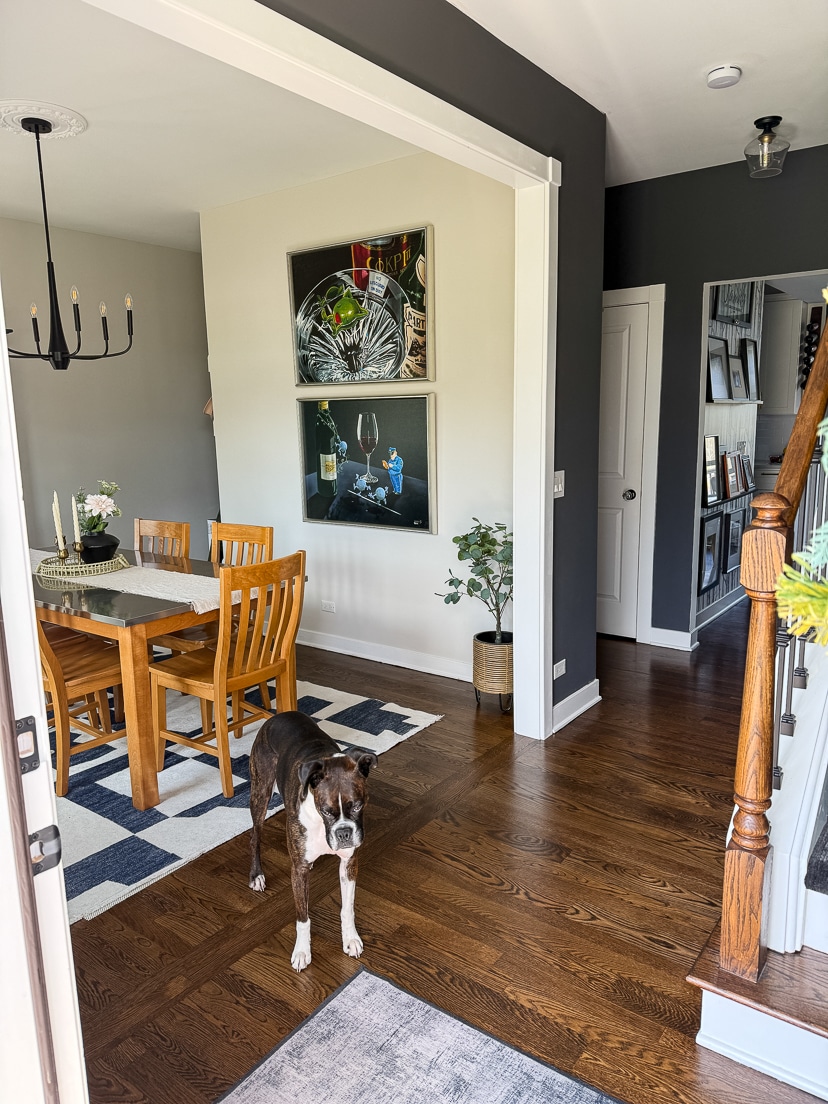
The whole project took just over three weeks, and this before and after dining room remodel was worth every bit of the disruption. Walking into our home now feels completely different. The dining room no longer feels cramped, the main floor has a flow it never had before, and we did not have to give up our lake view to get it.
Thank you for reading! Have you tackled a renovation that took on a life of its own once you got started? I would love to hear about it in the comments below.
Other posts you might like:
How We Transformed Our Outdated Home
Primary Bedroom Refresh Before & After
Do you have a friend who would also enjoy this post?
Just use any of the buttons below to share it!
If you’re not already on my newsletter list, come join me over on Substack! It’s free, and it’s where I share a little more of what’s going on behind the blog. Just click HERE and subscribe for free.
You can also join me on Instagram for daily style inspiration!
Share with a friend or pin and save!
Linking up with:
Between Naps on the Porch | I do de Claire | Walking in Memphis in High Heels & The Fashion Canvas | My Slices of Life | The Style Splash | Curated by Jennifer | Mummabstylish | Shelbee On the Edge | Nancy’s Fashion Style | Momfessionals | Marsha in the Middle
The remodel looks great! I love how open the space is now. You have such a great eye for design!
xo,
Kellyann
I love what you did Jill! It looks incredible. You decor is amazing. Especially that rug. I need you to redesign my home.
https://www.kathrineeldridge.com
It looks beautiful, Jill, and I love hearing all about your house projects. Have a great day!
That looks really lovely!
That looks so much better! I love open plan living, this gives that feel. And less expensive than moving!
Wow!!! You weren’t kidding when you said just widening the opening changed the whole look! It’s gorgeous. I love your home because it has so much character. I also love the white woodwork. We have done almost all of our DIY projects. The only time we had to hire someone was when I figured the width of a powder room wrong. This was at our house up north. We had to hire a plumber to move water lines. We even put in a walk in tile shower and did all the tiling ourselves. We have laid thousands of square feet of flooring…OK, maybe hundreds! Love the black paint, too…Tricorn black?
https://marshainthemiddle.com/
What an amazing transformation, just opening up that wall. It goes to show that little things can make such a difference…granted it wasn’t little when it came to the floors, LOL
XOOX
Jodie
You guys are really good at this!! Wow! You need your own show! I LOVE it. I really does open up the space and it looks so open now (and bigger!). I love the decor too!
Carrie
curlycraftymom.com
Such a smart change! And the floor looks flawless.
It looks fantastic! The work you have had done has really changed the space so much.
Such a beautiful transformation! I love how bright and fresh the space feels now—it really shows how much a few thoughtful updates can completely change a room. The mix of textures and finishes makes it feel so warm and inviting, too.
Oh my gosh! What a huge improvement. Love the way that area just flows now. Our house is quite compartmentalized in spaces, too. But we do have a wide open area that is the kitchen in the den. Love the colors you used and that fabulous rug. Bravo for doing all the work yourself. A plus.
Wow! Taking down that wall made all the difference in the world. That looks incredible!
It really does open it up! Looks great!
http://www.chezmireillefashiontravelmom.com
Wow! You have created a lovely open space for gathering!
This looks great and good call on the floors!
I completely understand not wanting to give up a stunning lake view and opening up the wall here makes such a big difference!
I hope you are having a great week so far!
Amber
Visit AvecAmber.com
Follow Avec Amber on Bloglovin
Your dining room looks absolutely beautiful, my friend! It looks so much more open and spacious, and I just love your hutch with the dishes!
Make Life Marvelous